|
| Author |
Message |
 Lonesome Crow
|
Post subject: How to scratch build Trim's Fighting Machine  Posted: Posted: Fri Jan 27, 2006 2:00 am |
|
 |
| Martian War Lord |
Joined: Mon Jan 17, 2005 10:31 pm
Posts: 3365
Location: N.Humberside.UK
|
|
|
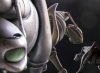
This is how I scratch built Trim's Fighting Machine, one day I may finish it 
Step 1. get hold of Trim's FM Blueprints, not difficult, they are posted on eveofthewars main site
Step 2. The main body. The best thing to do here, if you want to try and make one of these is print out the blueprint below and stick it to a piece of card about 1mm thick. you will see that the lines and dotted lines are of different colours, cut along the blue dotted lines but not the red dotted lines they are a gluing guide only, I'll explain the green lines when we get to them.
I said yesterday "I think I took photos of this model in progress" If I did they are still in my camera. and after 10 years or so I doubt the film is any good. 
| Attachments: |

Blueprint 1.jpg [ 71.86 KiB | Viewed 27214 times ]
|

http://www.youtube.com/watch?v=DldFBFJgWmw&feature=player_embedded
|
|
| Top |
|
 |
|
Lonesome Crow
|
Post subject: Posted: Sat Jan 28, 2006 12:57 am |
|
|
| Martian War Lord |
Joined: Mon Jan 17, 2005 10:31 pm
Posts: 3365
Location: N.Humberside.UK
|
|
|
Here are the ribs and the assembly diagrams.
This is where you find out what the green lines are for, if you are using 1mm card you will have to trim half the thickness of the card off each cut-out part i.e. 0.5mm, along the green line otherwise when you assemble the parts with the 5 ribs in place your model will be 5mm too long. This doesn't sound too bad but believe me it will screw everything up
Step 3. Assembling the skeleton.
Cut out the base and lay it on a flat surface, cut out the ribs and remove the half the thickness of the card from the green line. starting at the front of the base, super-glue Rib 1 to the first red dotted line (it's best just to put a spot of glue at each end of the bottom of the rib until you are happy with your positioning) make sure your ribs are at 90 degrees to the base. keep adding ribs and the middle spacers along the back as shown in Assembly stage 2 then do the underside as in Assembly stage 3.
Most of it is common sense and if you haven't got any common sense what are you doing trying to make this model?
| Attachments: |

Ribs Top & Bottom.jpg [ 63.98 KiB | Viewed 27205 times ]
|

Assembly stage 1.jpg [ 22.82 KiB | Viewed 26986 times ]
|

Assembly stage 2.jpg [ 23.3 KiB | Viewed 27250 times ]
|

Assembly stage 3.jpg [ 26.1 KiB | Viewed 27244 times ]
|
http://www.youtube.com/watch?v=DldFBFJgWmw&feature=player_embedded
|
|
| Top |
|
|
|
oever532
|
Post subject: Posted: Sat Jan 28, 2006 9:13 am |
|
 |
| Martian War Lord |
Joined: Sun May 29, 2005 5:02 pm
Posts: 3114
Location: Ridderkerk, the Netherlands
|
|
|
It's getting better over time.
The Tempest is an advanced assault vehicle, which carries two heavy Heat-Rays and a Canister Launcher.

|
|
| Top |
|
|
|
Lonesome Crow
|
Post subject: Posted: Sat Jan 28, 2006 3:17 pm |
|
|
| Martian War Lord |
Joined: Mon Jan 17, 2005 10:31 pm
Posts: 3365
Location: N.Humberside.UK
|
|
|
|
| Top |
|
|
|
Lonesome Crow
|
Post subject: Posted: Mon Jan 30, 2006 12:23 am |
|
|
| Martian War Lord |
Joined: Mon Jan 17, 2005 10:31 pm
Posts: 3365
Location: N.Humberside.UK
|
|
|
|
| Top |
|
|
|
Gone for a BURTON
|
Post subject: Posted: Tue Jan 31, 2006 4:43 pm |
|
 |
| Super Member |
Joined: Thu Feb 10, 2005 11:09 am
Posts: 112
Location: Northern Ireland so I am
|
|
|
|
You're the man!!
I am so gonna make me one of these over the weekend. If my wife lets me.! Oh to hell with it she'll just be pleased I'm not at the golf course again!
"We've gone on holiday by mistake....."
|
|
| Top |
|
|
|
Lonesome Crow
|
Post subject: Posted: Tue Jan 31, 2006 7:19 pm |
|
|
| Martian War Lord |
Joined: Mon Jan 17, 2005 10:31 pm
Posts: 3365
Location: N.Humberside.UK
|
|
|
|
| Top |
|
|
|
Lonesome Crow
|
Post subject: Posted: Tue Jan 31, 2006 9:41 pm |
|
|
| Martian War Lord |
Joined: Mon Jan 17, 2005 10:31 pm
Posts: 3365
Location: N.Humberside.UK
|
|
|
|
| Top |
|
|
|
oever532
|
Post subject: Posted: Wed Feb 01, 2006 4:27 pm |
|
|
| Martian War Lord |
Joined: Sun May 29, 2005 5:02 pm
Posts: 3114
Location: Ridderkerk, the Netherlands
|
|
|
|
It's getting better and better.
The Tempest is an advanced assault vehicle, which carries two heavy Heat-Rays and a Canister Launcher.
|
|
| Top |
|
|
|
Lonesome Crow
|
Post subject: Posted: Thu Feb 02, 2006 12:54 am |
|
|
| Martian War Lord |
Joined: Mon Jan 17, 2005 10:31 pm
Posts: 3365
Location: N.Humberside.UK
|
|
|
|
| Top |
|
|
|
Lonesome Crow
|
Post subject: Posted: Sun Feb 05, 2006 12:56 am |
|
|
| Martian War Lord |
Joined: Mon Jan 17, 2005 10:31 pm
Posts: 3365
Location: N.Humberside.UK
|
|
|
|
| Top |
|
|
|
Lonesome Crow
|
Post subject: Posted: Sun Feb 05, 2006 1:45 am |
|
|
| Martian War Lord |
Joined: Mon Jan 17, 2005 10:31 pm
Posts: 3365
Location: N.Humberside.UK
|
|
|
|
| Top |
|
|
|
Lonesome Crow
|
Post subject: Posted: Sun Feb 05, 2006 6:37 pm |
|
|
| Martian War Lord |
Joined: Mon Jan 17, 2005 10:31 pm
Posts: 3365
Location: N.Humberside.UK
|
|
|
|
Step 19.
Fold the side panels up so they are vertical, if you have got all your measurements right the front support strut inside should touch the other side panel and the bottom and should be flush with the top, Super-glue it in place, (DO NOT GLUE THE BACK ONE YET)
Now gently curl the front section up to meet the side panels Super-gluing as you go, it will try to crease where the holes are, don't let it, this bit must be smooth.
Step 20. Creating the curved underside.
Gently squeeze the side panels together till the support strut at the back meets the other panel, the paper underneath should bulge down (if it doesn't help it with a blunt instrument like the blunt end of a pencil) Super-glue strut in position.
Step 21. Super-glue the 0.25mm end panel on the back making sure it is flush with the top of the side panels, this should leave the card too long at the bottom , don't cut it off yet, it's useful for keeping the undercarriage standing upright.
The compartments between the front support strut and the back panel must be watertight so run a little Super-glue around the joins just to make sure.
Step 22. Pouring Resin.
I'm using Polyester glass fibre resin mixed with Polyester car body filler, add a little hardener and pour it into the central compartment it will flow into the rear compartment but shouldn't go any further. stop pouring about 1mm from the top.
| Attachments: |

Assembly stage 19.jpg [ 25.97 KiB | Viewed 27052 times ]
|

Assembly stage 20.jpg [ 23.98 KiB | Viewed 27039 times ]
|

Assembly stage 21.jpg [ 23.76 KiB | Viewed 26851 times ]
|

Assembly stage 22.jpg [ 23.94 KiB | Viewed 27105 times ]
|
http://www.youtube.com/watch?v=DldFBFJgWmw&feature=player_embedded
|
|
| Top |
|
|
|
McTodd
|
Post subject: Posted: Sun Feb 05, 2006 6:59 pm |
|
 |
| Tripod King |
Joined: Mon Feb 21, 2005 3:11 pm
Posts: 252
Location: Londoon, UK
|
|
|
|
Excellent models, as ever, and what a superb how-to guide!
|
|
| Top |
|
|
|
Klaatu
|
Post subject: Posted: Mon Feb 06, 2006 3:19 pm |
|
 |
| Tripod King |
Joined: Fri Feb 18, 2005 9:43 am
Posts: 307
|
|
|
|
This is so good...I can't wait to see the finished job.
"SUCH POWER EXISTS?"
|
|
| Top |
|
|
|
Lonesome Crow
|
Post subject: Posted: Mon Feb 06, 2006 8:46 pm |
|
|
| Martian War Lord |
Joined: Mon Jan 17, 2005 10:31 pm
Posts: 3365
Location: N.Humberside.UK
|
|
|
|
| Top |
|
|
|
Lonesome Crow
|
Post subject: Posted: Mon Feb 06, 2006 9:19 pm |
|
|
| Martian War Lord |
Joined: Mon Jan 17, 2005 10:31 pm
Posts: 3365
Location: N.Humberside.UK
|
|
|
|
| Top |
|
|
|
Loz
|
Post subject: Posted: Tue Feb 07, 2006 10:48 am |
|
 |
| Martian War Lord |
Joined: Sun Feb 13, 2005 10:00 pm
Posts: 2870
Location: Liverpool, UK
|
|
|
This is great. 
I've left a comment now> 
Bah bah black sheap April diamond spheres, Rigsby, Rigsby, Eight sided Pears.
|
|
| Top |
|
|
|
Lonesome Crow
|
Post subject: Posted: Wed Feb 08, 2006 12:29 am |
|
|
| Martian War Lord |
Joined: Mon Jan 17, 2005 10:31 pm
Posts: 3365
Location: N.Humberside.UK
|
|
|
I wondered how long it would be before you found this thread 
I'm trying to make it out of stuff you can pick up from any D.I.Y store, (yes, even Milliput can be bought from D.I.Y stores you will find it in the plumbing department, ask for epoxy putty) So anyone can have a go.
http://www.youtube.com/watch?v=DldFBFJgWmw&feature=player_embedded
Last edited by Lonesome Crow on Wed Feb 08, 2006 1:50 am, edited 1 time in total.
|
|
| Top |
|
|
|
Lonesome Crow
|
Post subject: Posted: Wed Feb 08, 2006 1:44 am |
|
|
| Martian War Lord |
Joined: Mon Jan 17, 2005 10:31 pm
Posts: 3365
Location: N.Humberside.UK
|
|
|
|
| Top |
|
|
|
Klaatu
|
Post subject: Posted: Wed Feb 08, 2006 9:20 am |
|
|
| Tripod King |
Joined: Fri Feb 18, 2005 9:43 am
Posts: 307
|
|
|
|
Those diagrams are a work of art in themselves Lonesome...Excellent!
"SUCH POWER EXISTS?"
|
|
| Top |
|
|
|
Lonesome Crow
|
Post subject: Posted: Wed Feb 08, 2006 10:58 pm |
|
|
| Martian War Lord |
Joined: Mon Jan 17, 2005 10:31 pm
Posts: 3365
Location: N.Humberside.UK
|
|
|
|
| Top |
|
|
|
Lonesome Crow
|
Post subject: Posted: Thu Feb 09, 2006 11:38 pm |
|
|
| Martian War Lord |
Joined: Mon Jan 17, 2005 10:31 pm
Posts: 3365
Location: N.Humberside.UK
|
|
|
Step 28. Offering Up.
Offering up, this means trying something in position to see if you've got it right. So Offer up the assembled pod template to make sure all the parts of the templates touch the main body and at the same time, that the front vertical cutout template is parallel to the join line at the back of the hood. When you are happy with the positioning, super-glue all parts of the template together (Don't glue it to the body).
Step 29.
Fill all the spaces with polystyrene using epoxy resin to glue them in (the same as you did with the body)
Sand paper the polystyrene back to the cardboard, remember to keep offering up to check you are not removing too much.
You can see I have drawn in the outline of the hole in the front of the pod, Trim's blueprints are a bit vague here so I used the 'THUNDER CHILD' painting for a clearer idea.(I always thought this hole was the Black Smoke canister launcher, but 'H_C' tells me they are orange lights,  Though I don't know why a FM would need turn indicators )
Step 30.
Offer up again to make sure there isn't any bits of polystyrene preventing the pod from going home.
Step 31.
Pop down to your local super market and find one of those small plastic fizzy drink bottles, the type with the rounded blisters on the base, the rounder the better. Slice a couple of these blisters off (Make sure the bottles empty first ).
| Attachments: |

Assembly stage 28.jpg [ 27.4 KiB | Viewed 26805 times ]
|

Assembly stage 29.jpg [ 25.47 KiB | Viewed 27021 times ]
|

Assembly stage 30.jpg [ 22.98 KiB | Viewed 26967 times ]
|

Assembly stage 31.jpg [ 32.35 KiB | Viewed 27025 times ]
|
http://www.youtube.com/watch?v=DldFBFJgWmw&feature=player_embedded
|
|
| Top |
|
|
|
|